
I love how this room has come together. Click here to see what it looked like before. We have a teal loveseat, green fireplace and green background from the windows in this room. I picked out some pillows for this room and wanted to make sure they did not clash. The last thing we have to do is paint the stair rail. We have a ton of greens in this room. I thought these tan pillow case covers from Bed Bath and Beyond were perfect! I also used these on my patio for some pillows that were green. I stuffed them with Poly-fil and am going to show how easy it is today.  Fairfield World, the makers of Poly-fil is turning 80 years old this year! (#fairfield80, #polyfil, #poly-fil, #FFWcelebration) I received the Poly-fil and these goodies for this project.
 To make these pillows I got some pillow shams from Bed Bath and Beyond. I have one bag of 32 ounces of Poly-fil. I opened the bag and filled the pillows to my desired "stuffiness". That is the great thing about filling pillows, they can be as hard or soft as desired. We like medium stuffiness here.
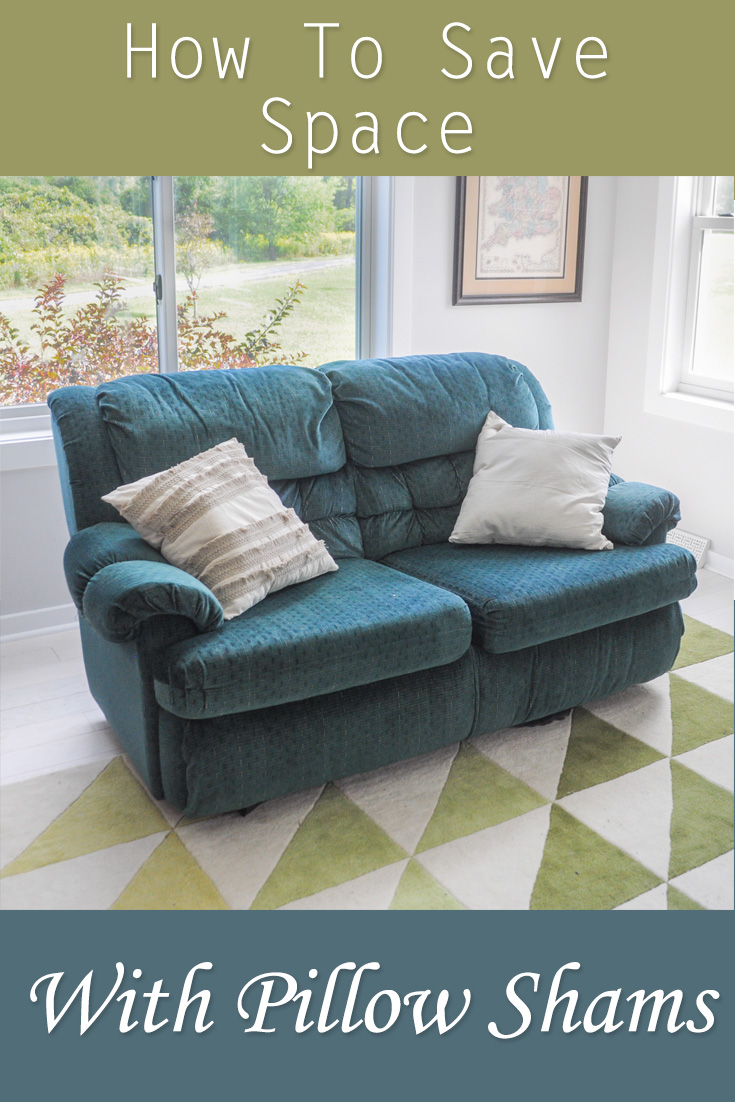
 Here is the finished product. I love how they turned out. They fit in really well with the decor in the room and are super comfortable to sit and take a nap with!
  The perfect thing about this project is if we decide to change the pillows they can be changed out with other shams and folded, not taking up a lot of space!


How to Save Space and Stuff Pillow Shams with Poly-fil


How to Make a Pillow with a Pillow Using Poly-fil and Insulate a Bag
Who likes spending time outdoors? We love it here! One of our favorite spots to spend time is the deck. It overlooks the woods. We can hear the birds chirping and leaves rustling. It is the most relaxing thing ever. I have three kids so time by myself is hard to come by. But I try to get out for at least an hour without them and sit in piece on my patio and relax. I was super excited to do some projects with some products Poly-fil sent me. All opinions are my own.

Read More »
This blog post contains affiliate links.

 I found a pillow cover at Bed Bath and Beyond. I honestly do not know why more pillow covers are not the norm. At Ikea they only sell pillow covers. Instead of buying pillows every season and storing them in a random closet pillow covers can be stored like pillow cases for a bed. And then taken off and washed from time to time.
 I stuffed an old pillow in the pillow cover, but because the pillow was a little smaller than the pillow cover there was lots of extra room. I then stuffed the Poly-fil around the other pillow to make the new pillow nice and fluffy.
To make my time even more relaxing I stuff some pillow covers with Poly-fil Premium Polyster Fiber Fill and lined my bag with solarize. That way if I take out chocolate it will not melt in my bag.
To insulate the bag I cut the inside of the bag and put the solarize inside. Then I sewed the bag back shut. Now I can keep chocolate in there and not have it melt super fast!
What do you like better the insulated bag or the stuffed pillows?
There is even a giveaway going on for more Poly-fil and a $100 JoAnn Gift card!
Our Family Story Wall Hanging
We have been renovating our house like CRAZY. I am excited to finally start putting things on our walls. I thought a "Our Family Story" would be a great addition to our wall. It has the day we met, our anniversary, and birthdays of all the kiddos. It can be made to accomodate any size frame. For this project I used an 8x10.
This post contains affiliate links.

1. The first step is to select some paper.
- white cardstock
- black cardstock
2. The second step is to put in the correct dates and number of kids. To put in the dates change the text box. To add kids or change gender copy and paste the kids in front of each date. Here is the file. After the dates are changed weld the text together otherwise it will come out in separate circles.
 3. Cut this file with the black cardstock.

4. The cutouts can be removed two ways, with this Cricut tool flat, or bending the board and gently separating the cardstock from the board. This helps prevent the paper from bending.

5. The first time I did this I did not cut deep enough and the letters were stuck in the circle. Instead of using the scissors, I opted to cut again deeper and save myself a headache.

MUCH BETTER!

6. The sixth step is to clean the extra letters off the mat and put it away. This way the mat will not get sticky.

7. The next step is to arrange and glue the letters to the white cardstock.
8. The final step is to put the cardstock in a frame and put on the wall. My kids love this! Enjoy!

Thanks so much for 100 Directions, Mad in Crafts, 33 Minute Crafts and The Country Chic Cottage for putting this together!

